
In the world of customer service, the right chatbot can be a game-changer. If you're using Punya AI's customer support chatbot, you're already on the path to providing excellent automated support to your users. However, to truly make the most of this tool, you should know how to customize it to fit your brand and your specific needs. Customization not only enhances user experience but also aligns the chatbot's appearance and responses with your company's identity. In this post, we'll guide you through the process of customizing your Punya AI chatbot in two simple ways.
1. Basic Customization via the Settings Page
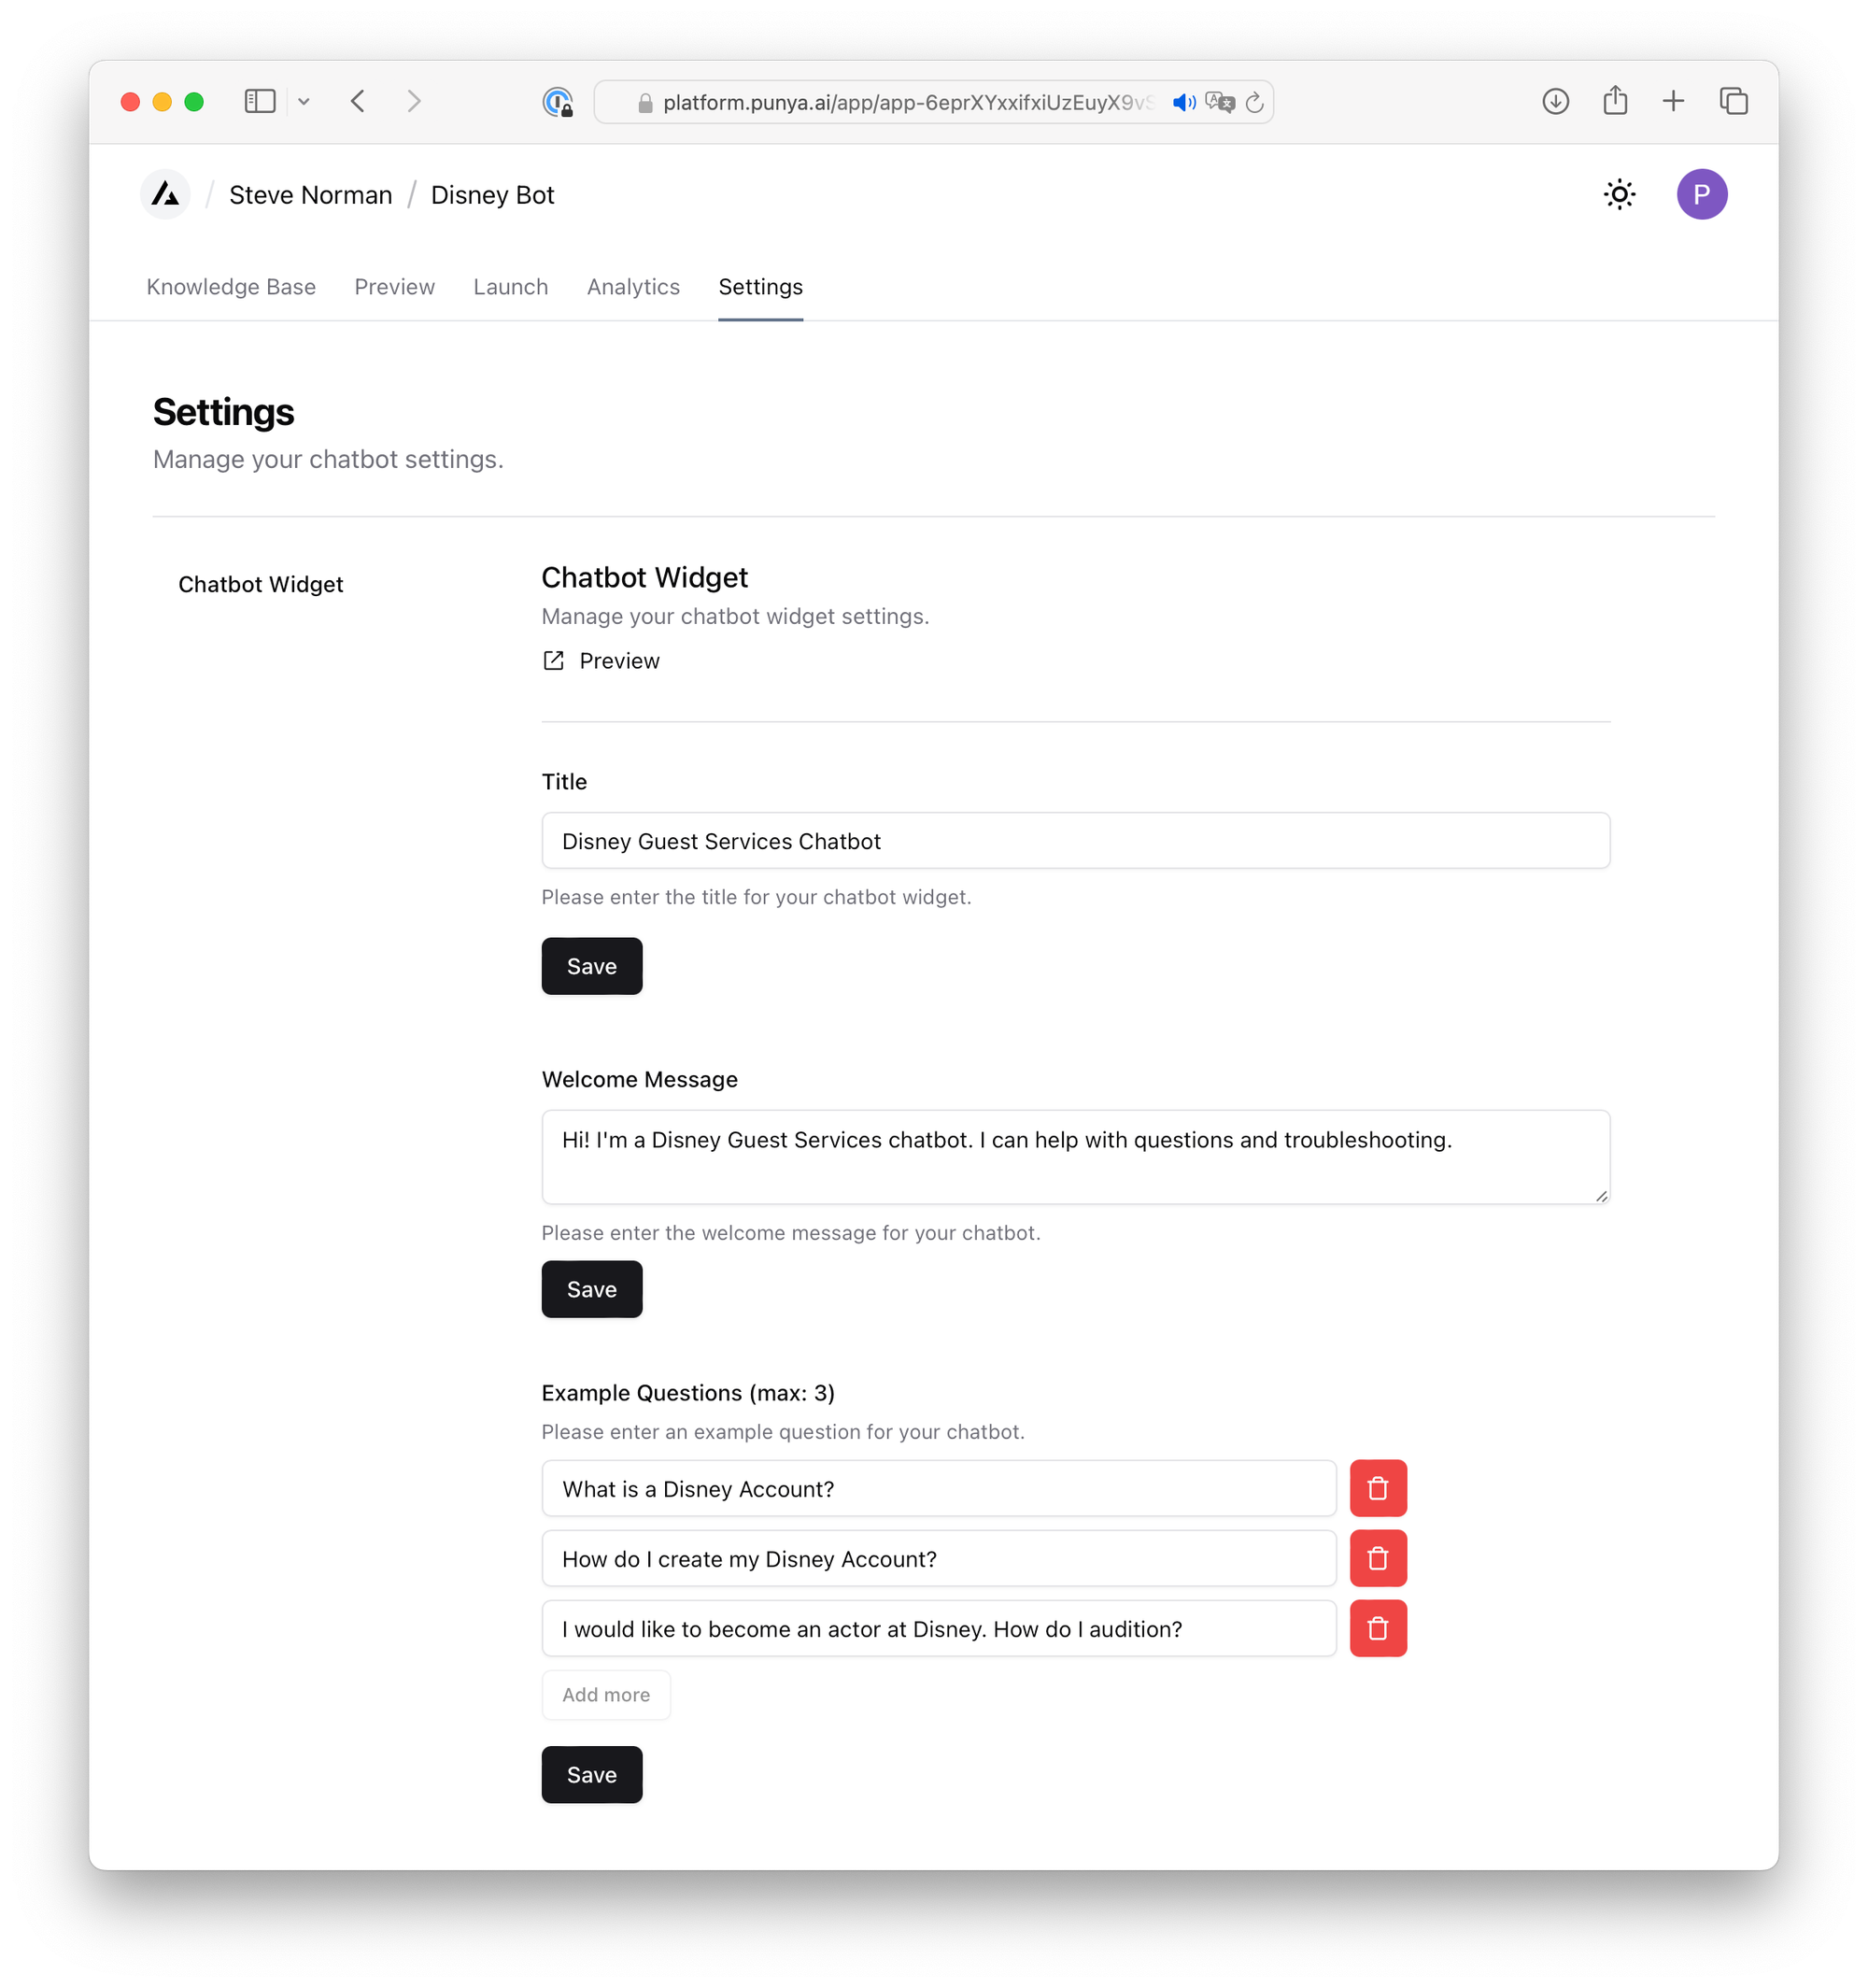
The simplest way to customize your Punya AI chatbot is through the Punya Platform's Settings page. This method does not require any coding skills and can be done quickly. Here’s how:
Accessing the Settings
- Navigate to the Settings page on the Punya Platform.
Customization Options
Once there, you'll find several options to personalize your chatbot:
- Chatbot Widget Title: Change the title of your chatbot widget to something that resonates with your brand or purpose.
- Welcome/Initial Message: Set up a greeting message or a brief explanation of what the chatbot can do. This is the first interaction your users will have with the chatbot, so make it count!
- Example Questions: Add example questions that will appear as quick buttons at the bottom of the chat widget. This not only aids users in starting a conversation but also gives them a clear idea of the kind of assistance the chatbot can provide.
These changes can significantly enhance the user experience by making the chatbot more intuitive and helpful.
2. Advanced Customization via Code Snippets
For those who want more control and have some technical know-how, the second method involves adding parameters to the code snippet of your chatbot widget. This method builds upon what you learned in our previous blog post, "How to install Punya AI Chatbot to your website".
Understanding the Code Snippet
In the <div id="punya-chat-widget"> tag, you can add various parameters to further customize your chatbot. Remember, all parameters should be prepended with data-.
Available Parameters
data-title: Customize the title of your chatbot widget.data-welcome-message: Change the welcome message to make it more engaging or informative.data-color1anddata-color2: These parameters allow you to set the background colors of your chatbot widget, creating a linear gradient from the top left corner to the bottom right. Colors must be in hex code format (e.g.,#62c1f8).
Here is an example code snippet with the above parameters:
<div id="punya-chat-widget" data-app-id="app-12345" data-title="Disney Guest Services Chatbot" data-welcome-message="Hi! How can I assist you today?" data-color1="#ffc1f8" data-color2="#5d5fee"></div>
<link rel="stylesheet" type="text/css" href="https://static.punya.ai/chat-widget-assets/punya-ai-chat-widget.css">
<script src="https://static.punya.ai/chat-widget-assets/punya-ai-chat-widget.js"></script>
Here's what this chatbot widget looks like after changing the parameters:

Using these parameters, you can create a chatbot that not only matches your website’s aesthetic but also feels like an integral part of your service.
Get Started with Your AI Chatbot in 5 Minutes!
Inspired by this story and interested in creating your own AI chatbot? You're just 5 minutes away from starting! Visit Punya to sign up and begin crafting your custom chatbot. Our user-friendly platform makes it easy for you to set up a chatbot tailored to your business needs. Don't miss out on the opportunity to transform your customer support with AI.

About Steve Norman
Revolutionize your AI applications with Punya: an AI-powered chatbot and analytics platform. For business inquiries, please email admin@punya.ai.